728x90
반응형
Spring 문서화 도구
Spring에서 많이 사용되는 문서화 도구에는 RestDocs, Swagger가 있습니다.
- RestDocs : 테스트 케이스를 통과할때만 문서가 만들어지도록 강제하여 코드의 검증이 어느정도 가능하다.
- 문서 추가시 asciidoc 문서 수정 필요
- Swagger : OpenAPI로 화려한 UI와 API 테스트가 가능한 문서 작성이 가능하다.
- Swager-UI 사용시 단점 : 코드에 어노테이션으로 도배되어 가독성이 떨어짐
- Redoc : OpenAPI 스펙의 파일을 읽어 깔끔한 UI로 문서화가 가능하며, Swagger와 마찬가지로 OpenAPI 로 동작하기 때문에 함께 이용하기에 부담이없다.
참고사이트
RestDocs에서 OpenApi 스펙 추출
[https://taetaetae.github.io/posts/a-combination-of-swagger-and-spring-restdocs/]
[https://shirohoo.github.io/backend/test/2021-07-17-swagger-rest-docs/#-%EB%B0%9C%EC%83%81]
[https://pointnet.github.io/redoc-editor/#/]
[https://github.com/Redocly/redoc]
Redoc이란
- OpenAPI Spec 파일을 읽어서 디플로이해주는 도구
- Swagger-UI가 없으면 API 테스트는 불가하다.
- 3 패널 UI와 깔끔한 UI로 보기 편하다.
사용하는 방법
- RestDocs로 테스트 케이스 작성 (SpringDocs 이용)
- 아래의 restdocs-api-spec 오픈소스로 OpenApi3 형태 추출
- redoc 문서로 반환
** Swagger-UI와의 연동은 제외해서 진행
Restdocs에서 OpenAPI3로 변환해주는 오픈소스
https://github.com/ePages-de/restdocs-api-spec
build.gradle
plugins {
id 'java'
id 'org.springframework.boot' version '3.0.5'
id 'io.spring.dependency-management' version '1.1.0'
id 'com.epages.restdocs-api-spec' version '0.17.1'
id 'org.asciidoctor.jvm.convert' version '3.3.2' // REST Docs
}
apply plugin: 'com.epages.restdocs-api-spec'
group = 'unit.walter'
version = '0.0.1-SNAPSHOT'
sourceCompatibility = '17'
configurations {
compileOnly {
extendsFrom annotationProcessor
}
asciidoctorExtensions // REST Docs
}
repositories {
mavenCentral()
}
test {
useJUnitPlatform()
}
dependencies {
implementation 'org.springframework.boot:spring-boot-starter-web'
compileOnly 'org.projectlombok:lombok'
annotationProcessor 'org.projectlombok:lombok'
asciidoctorExtensions 'org.springframework.restdocs:spring-restdocs-asciidoctor' // REST Docs
testImplementation 'org.springframework.boot:spring-boot-starter-test'
testImplementation'com.epages:restdocs-api-spec-mockmvc:0.17.1' //2.2
testImplementation 'org.springframework.restdocs:spring-restdocs-mockmvc' // restdocs
}
tasks.named('test') {
useJUnitPlatform()
}
asciidoctor {
dependsOn test
}
bootJar {
archiveFileName = 'redoc_exam.jar'
}
openapi3 {
server = 'http://localhost:8080'
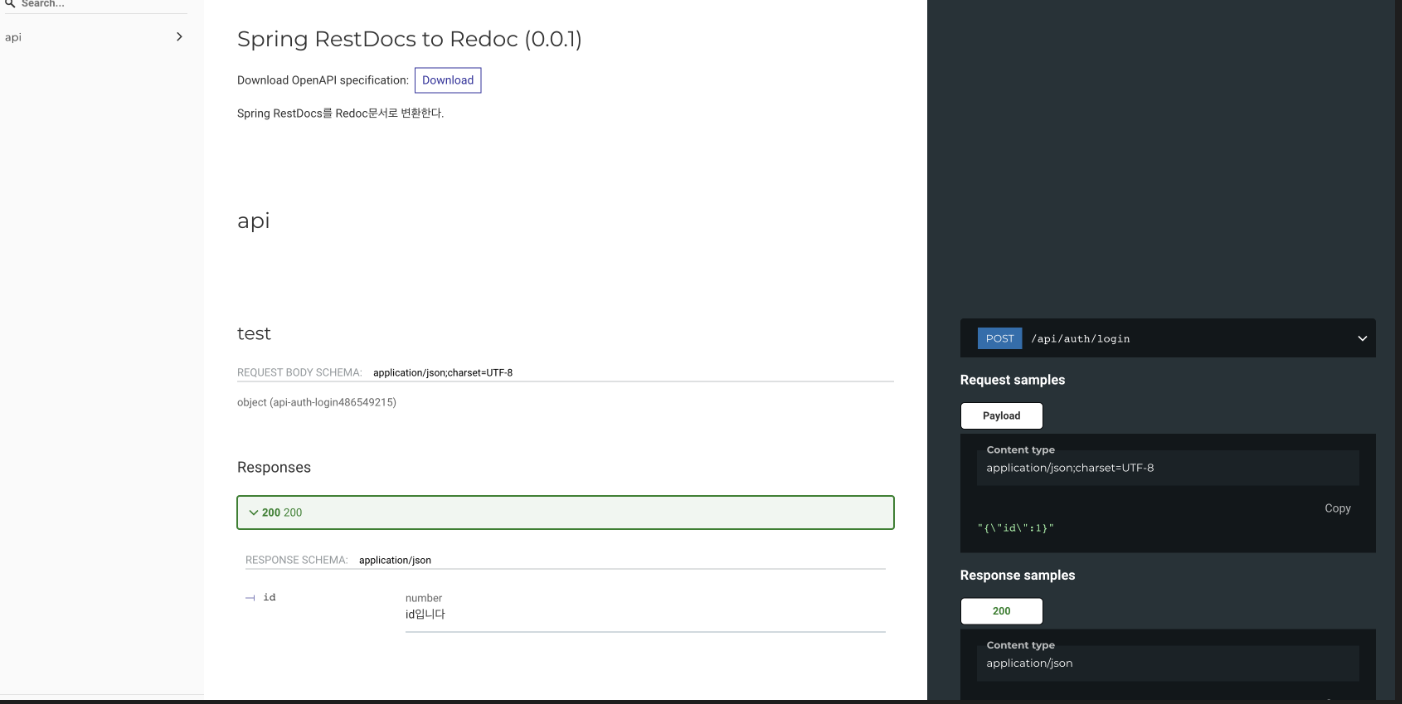
title = 'Spring RestDocs to Redoc'
description 'Spring RestDocs를 Redoc문서로 변환한다.'
version = '0.0.1'
format = 'yaml'
// openapi3 실행시 build에 생성된 파일을 static/docs로 복사한다.
copy{
from "build/api-spec/openapi3.yaml"
into "src/main/resources/static/docs"
}
}
api.html 정의
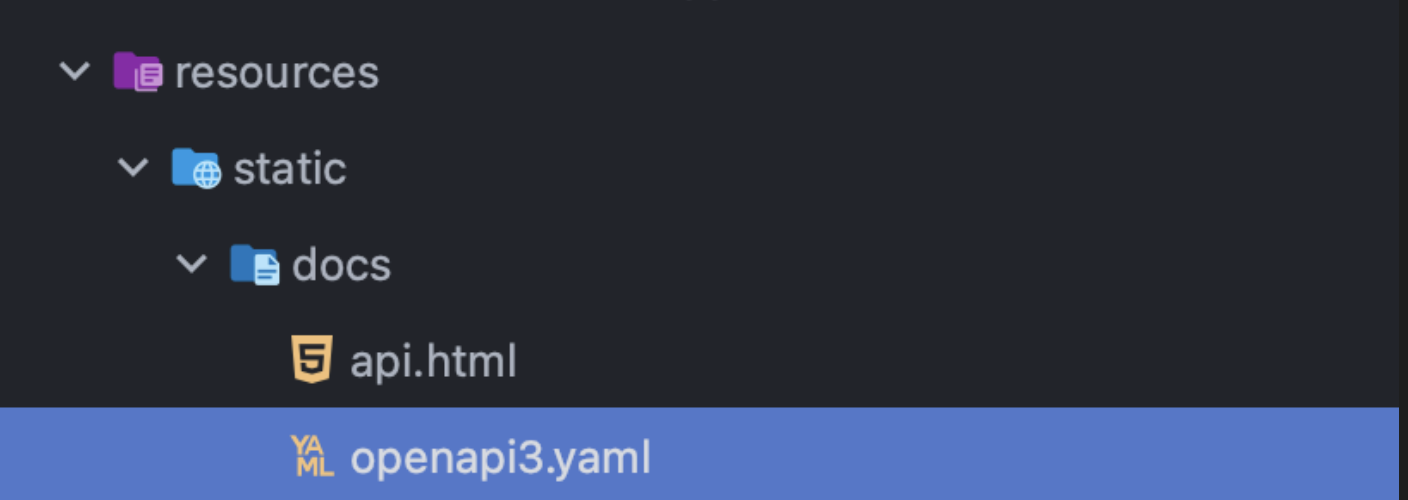
- 경로 : resources/static/docs/api.html
<!DOCTYPE html>
<html>
<head>
  <title>Redoc</title>
  <!-- needed for adaptive design -->
  <meta charset="utf-8"/>
  <meta name="viewport" content="width=device-width, initial-scale=1">
  <link href="https://fonts.googleapis.com/css?family=Montserrat:300,400,700|Roboto:300,400,700" rel="stylesheet">

  <!--
  Redoc doesn't change outer page styles    -->    <style>
    body {
      margin: 0;
      padding: 0;
    }
  </style>
</head>
<body>
<redoc spec-url='http://localhost:8080/docs/openapi3.yaml'></redoc>
<script src="https://cdn.jsdelivr.net/npm/redoc@latest/bundles/redoc.standalone.js"> </script>
</body>
</html>
Model 작성
@Data
@NoArgsConstructor
@AllArgsConstructor
@Builder
public class User {
    private Integer id;
}
Controller 작성
@RestController
@RequiredArgsConstructor
@RequestMapping("/api/auth")
public class AuthController {

    @PostMapping(value = "/login")
    public ResponseEntity login(User loginRequest) {
        User build = User.builder().id(1).build();
        return ResponseEntity.ok().body(build);
    }

}
ControllerTest 작성
@SpringBootTest
@ExtendWith(SpringExtension.class)
@AutoConfigureMockMvc
@AutoConfigureRestDocs
public class RestDocTest {

    @Autowired
    MockMvc mockMvc;

    @Autowired
    private ObjectMapper objectMapper;


    @Test
    void testSpringDocsToRedoc() throws Exception {
        String URL = "/api/auth/login";

        ResultActions resultActions = mockMvc.perform(
                        RestDocumentationRequestBuilders.post(URL)
                                .content(objectMapper.writeValueAsString(User.builder().id(1).build()))
                                .contentType(MediaType.APPLICATION_JSON)
                )
                .andExpect(status().isOk())
                .andDo(print())

                // restdocs
                .andDo(document(
                        "test"
                        , resourceDetails().tag("auth관련 API")
                        , resource("springDocs to redoc")
                        , responseFields(
                                fieldWithPath("id").description("id입니다")
                        )
                ));
    }
}
결과
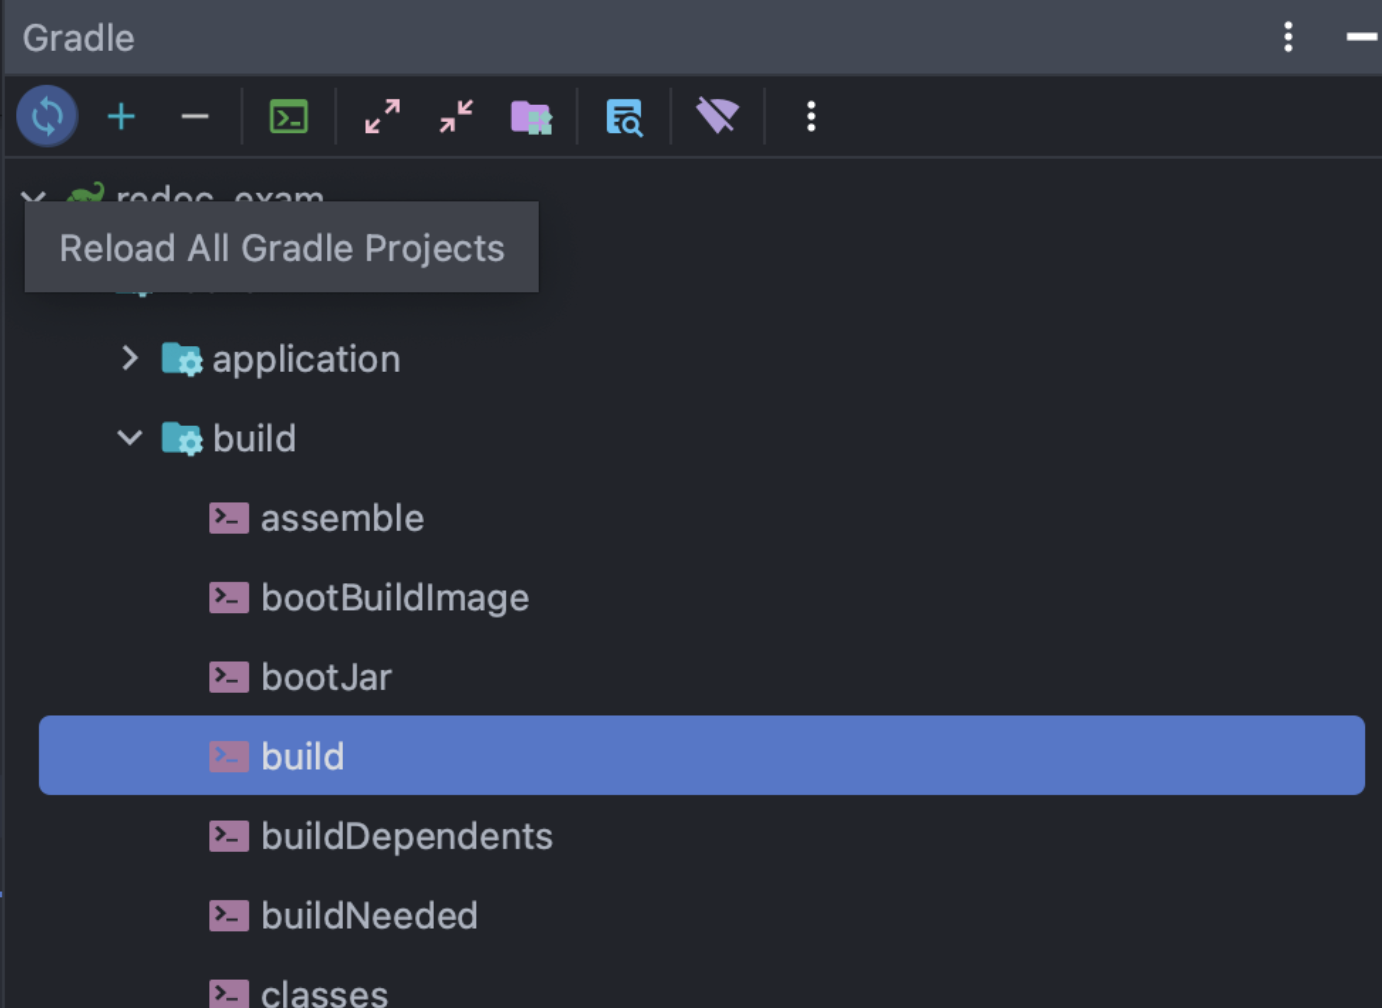
- gradle -> tasks -> build -> build 실행
- resources/static/docs/openapi3.yaml 생성
- 프로젝트 실행(RUN)
- localhost:8080/docs/api.html 접속
제주삼다수 그린 무라벨
COUPANG
www.coupang.com
파트너스 활동을 통해 일정액의 수수료를 제공받을 수 있음
반응형
'Swagger' 카테고리의 다른 글
| [Swagger] Swagger Editor 설치 (0) | 2023.04.06 |
|---|
